So the past 2 weeks have all been about SPRING. Dont you just Love that word. :D I have got my seeds that I can get started now up and growing. Yesterday I planted a bunch more herbs and bedding out plants. The greenhouse (more of a lean-to) design has been finalized by the man of the house. ;) Working for a lumber yard has its privlages. :) My wonderful husband has also started on my new raised garden bed boxes and 2 planters made from recycled pallets. Ill post pics when they are planted up.
On top of the smell of dirt in the house I also have bits and pieces of fabric laying around. My BFF is expecting again and being a mom of 4, I think I have a pretty good idea of what works and what doesnt. So when I came across this pattern for a baby swaddler from Craft Gossip I just couldnt resist. There is Nothing better than being able to have 2 minutes to breathe when the babies are little. So can you imagine not having to burrito wrap every 2 minutes because the little one has kicked its self free. Whoo Hoo. Up until yesterday they didnt want to find out what baby was so everything I made had to be gender neutral. So going through my fabric bins I came across this wonderfully bright animal print and the lining is a cream light weight micro fleece. I had just enough fabric for this project, thankfully. LOL I used cabbage baby as my model because I think my own "baby- he will be 2 this month" would get a little upset if I tried to stuff him into this. Plus cabbage baby is aprox the same size a 6.5lb 18 inch long baby. LOL


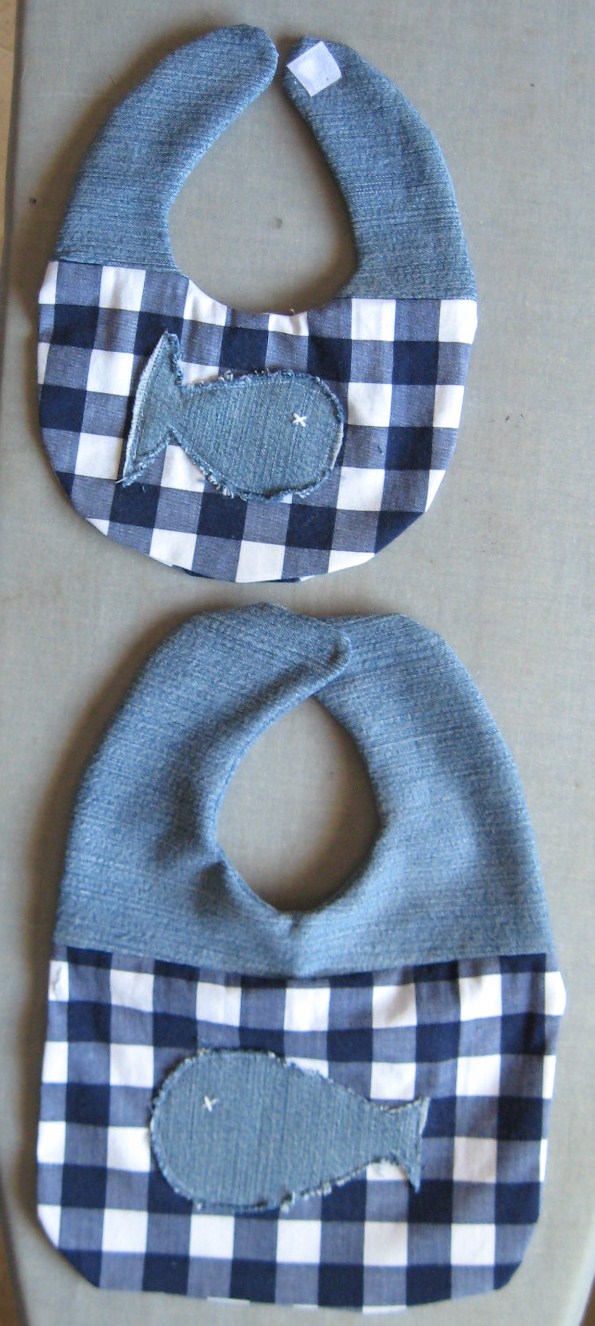
 And while I was digging through my bins I thought I would make a few extra large reversible bibs. These are denim (very absorbant and durable) and printed cotton (hides stains better). The fish were my 3 year olds idea. The cut out from the neck looked like a fish, so we machine appliqued it on leaving a 1/8 inch allowance around the outside. I then frayed the edge (love the dimensional effect) and added some hand embroidery for the eyes.

 Anyways I should get my day started. It is going to be a busy month with a baby shower, Easter, and a 2 year old's birthday to plan. So until next time. Happy Creating!
Tammy
On top of the smell of dirt in the house I also have bits and pieces of fabric laying around. My BFF is expecting again and being a mom of 4, I think I have a pretty good idea of what works and what doesnt. So when I came across this pattern for a baby swaddler from Craft Gossip I just couldnt resist. There is Nothing better than being able to have 2 minutes to breathe when the babies are little. So can you imagine not having to burrito wrap every 2 minutes because the little one has kicked its self free. Whoo Hoo. Up until yesterday they didnt want to find out what baby was so everything I made had to be gender neutral. So going through my fabric bins I came across this wonderfully bright animal print and the lining is a cream light weight micro fleece. I had just enough fabric for this project, thankfully. LOL I used cabbage baby as my model because I think my own "baby- he will be 2 this month" would get a little upset if I tried to stuff him into this. Plus cabbage baby is aprox the same size a 6.5lb 18 inch long baby. LOL


Tammy
Comments
Post a Comment