
Hanging out Watercolor Portrait Tutorial


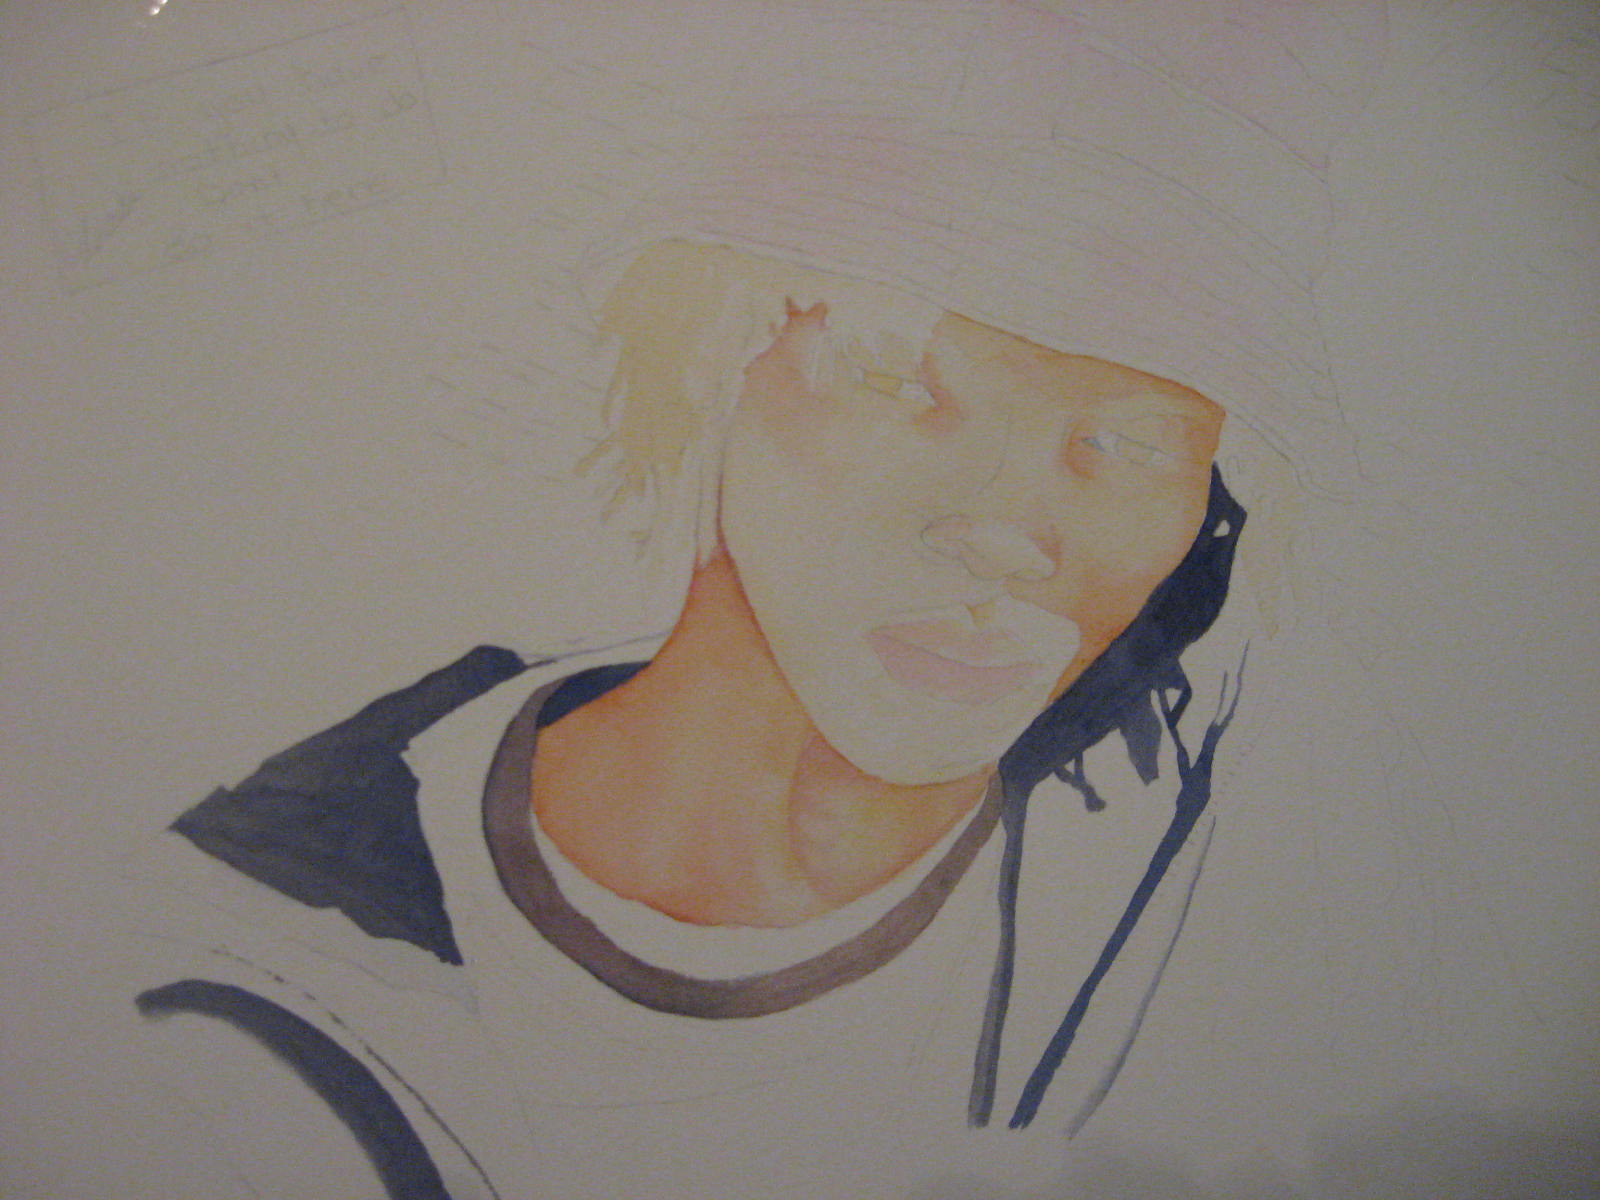
Another painting started .. i just love the expression on this teens face.. it represents that genre very well.(man i sound old all of a sudden) LOL Anyways just a simple pallette Skin tones - raw sienna, alizarin crimson, and ultramarine blue. Work slow .. develop your warms .. thin washes wet on wet and **let dry in between***
When you are waiting for the initial skin tones to dry move onto another area that does NOT touch and adjacent area that you have worked on.
For the jacket I used just a simple wash of UMB and Burnt Sienna. Cobalt blue for a bounce of stronger color in the white shadows.

Keep developing your skin tones. dampen a small area at a time, drop in your color and walk away.
For the hat I used a light wash of perm. rose.. dry and then cobalt blue. Enhance the shadows and the stiching on the hat with a mix alizarin crimson and UMB that you have been using on the face. This will help to tie everythig together. I also used perm rose and cobalt underwashes on the shirt and banding.
I am really loving the skin tones in this one. They are almost flawless.. Something I have been striving to do since I started painting in watercolor. :) I started the hair working wet on dry with seperate mixes of burnt sienna and van dyke brown. Careful not to cover all your underpainting. It gives the impression of sparkle and light. Pop in some darks using the UMB and alizarin crimson mix that u have been using in his face.

A bit more progress made on the jacket. I will be fixing the uneven shadow wash on the left side of the collar and adding some more texture and detailing on the jacket. I have added in his eyebrows using vandyke brown and your purple mixture from the previous steps and adjusted his right eye, it was looking a little big. Thinking i may want to reevaluate the background. In the photo he is shown in front of a chain link fence. I just love the way he is turning out and I dont want him to be competing with the background so I am thinking of just a dark green/grey soft foliage background.
 

A quick update after the first background wash has been applied. I still have about 10 washes and a color adjustment to go in order to get the depth that I want, but it is the impression I was going for. The green/blue background really makes his face glow. I usually dont use masking fluid but i had to make an exception for this one because i really didnt want to be trying to paint around the hair. I hope that when i peel it away it will come off nicely without having to many touch ups to do.
Posted by Picasa

Whoopie. I am sooo excited by this piece.
Would love to hear what you think. :)

Happy Painting

Comments

Popular posts from this blog

DIY Crayon costume for Halloween

Halloween is my favorite time of year. We spend weeks getting our yard and home decorated all for the night when the little ghosts and goblins come out to play. ;) B started school this year and within her school, they don't do a Halloween per say, they have an orange and black day. So in order to kill 2 birds with one stone, we decided that she is going to be an orange crayon. So with an old t-shirt and a little black felt fabric, this is what I came up with. I think it turned out Awesome! And the best part is that it was a no-sew project. Supplies needed:  1 t-shirt in the size required. 1 box of orange fabric dye (because they didn't' have any orange t-shirts in her size) 1 wooden spoon 1 large container for dying remnant black fabric. I used black felt because that is what I had on hand. 1 pattern for the Crayola font - I used this one Crayola pattern  and made the size adjustments accordingly when I was printing it out. For the crayon label banding, I just wi

Halloween Haunt - DIY Rotting Flesh/ Corpsing prop tutorial

Here is one of the techniques I use to attain the rotting flesh look on cheap plastic dollar store Halloween props.  Supplies you will need: plastic body parts or skeletons cheap plastic wrap - it doesn't matter what brand  heat gun or high-temperature hairdryer wood stain ( I used oak because that is what I had laying around) spray paint ( red and black) craft paint (red, black, dark brown, white, grey and green)   First, wrap your cheap skulls or bones in a few layers of plastic food wrap. It doesn't matter what brand. Then take your heat gun and melt areas away until you get your desired look. Some hairdryers may not be able to get hot enough to do this. Then take your wood stain and start adding a little colour.  Color choices are completely up to you but i used red, flesh, dark brown, black, white, grey. On the skull, I added some black spray paint in the hallows of the eyes to add a little more dimension.  Hope this inspires you to try a new prop id

Sailboat at sunset watercolor painting tutorial

Just a quick demo on how I painted this sailboat at sunset. Colors used: Indian Yellow, Napthol Red, Alizarin Crimson, Royal Blue, Burnt Sienna and Brillant Orange and permenant ink First draw out your image and mask off your sun spot - dry. I chose to use ink as a base to this painting applying it both directly and using it as a wash to add some shadows. Next wet the entire sky area. Working around your sun spot start by adding a graduated wash of indian yellow from the bottom to about 3/4 the way up, then add in alizarin crimson, and at the top work in a band of royal blue letting it run down a little. DRY The sky is not holding the weight I need it to so I wen over it again using the same colors and technique. This time adding a band of brilliant orange along the bottom. Looking better but still not quite there. So lets dry and move on to another area so that I can come back and judge the values. The sails were added using a mix of BS, brilliant orange and indian yellow. D